Add new entries simply by filling in the data in the rows under the pre-filled sample entries.
Note: the Aircraft Type must exactly match the Aircraft Type entered in on the Dashboard (which must be entered manually).
E.g. C152 in your Logbook Entries will not be calculated towards hours for C-152 (with the hyphen in between) on your Dashboard.
Adding new rows
By default, the Excel Pilot Logbook comes with 1000 rows. If you've run out of space, you can easily add more rows to your logbook.
- Select numerous empty rows (by clicking and dragging the row numbers on the left hand side).
- ‘Right click’ on the column which lists the row numbers and click “Insert”.
- Repeat this for how every many new rows you may require.
HINT: However many empty rows you select before clicking insert, will be the same number of new rows that are added. So, the more rows you select, the more you will add.
Dashboard Totals incorrect afterwards
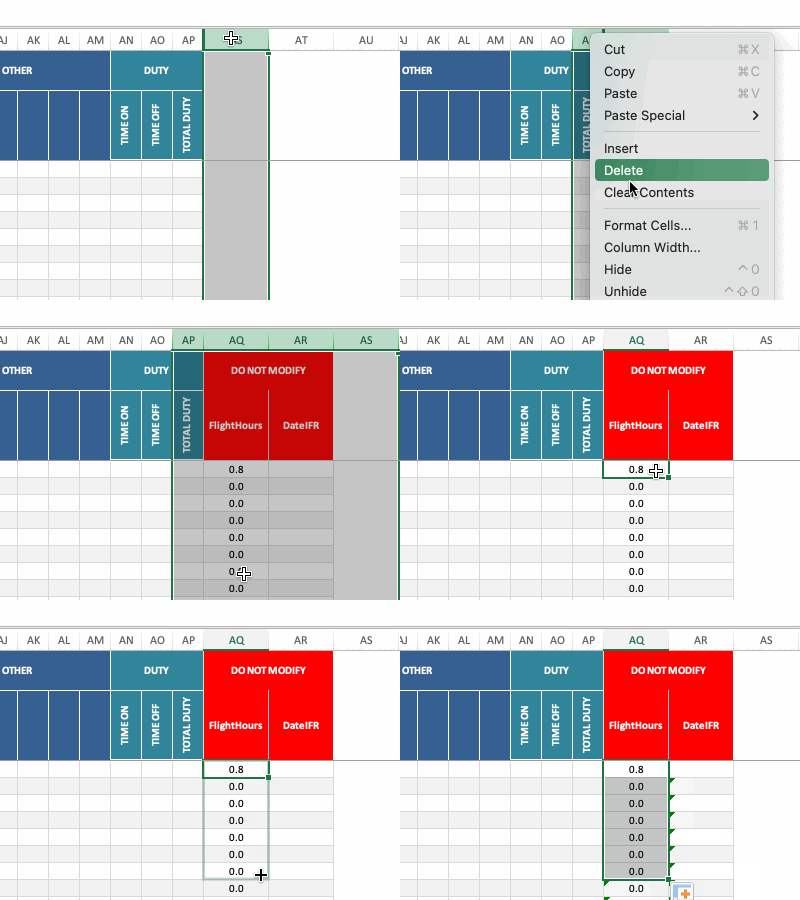
Sometimes when Adding New Logbook Entries, Excel or Google Sheets will not automatically add the hidden formulas (which total the flight time in each row, which in turn are used in the Dashboard to total your hours).
On the Logbook page, highlight the columns letters (at the top) on the far right of the page, right click on them and select "Unhide".
Select the top 2 cells, click and drag the blue box in the bottom right hand corner all the way down to the bottom of your Logbook Entries table (this will copy the formula).

